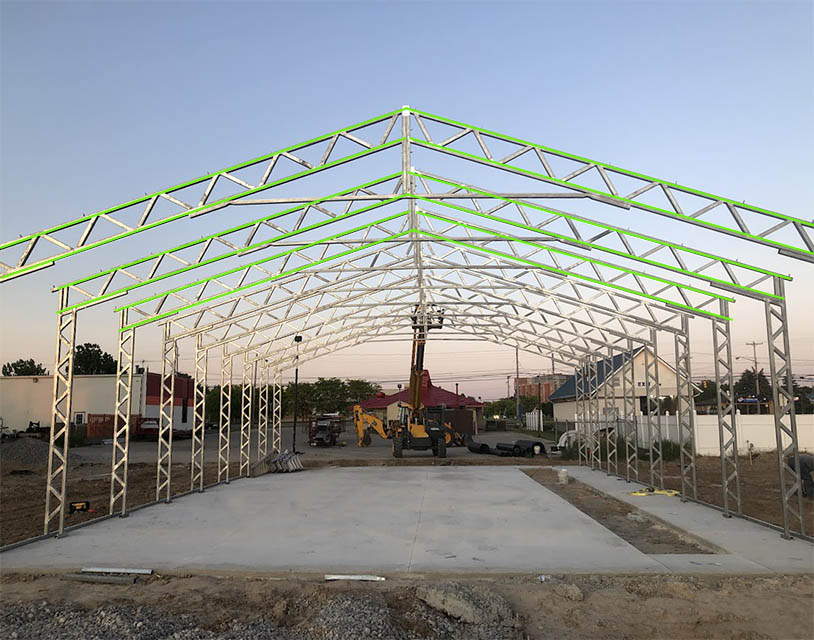
Short Answer: Although the installation process varies among contractors. You can generallt except the installation process to go as follows: Concrete sealant, base rails, legs, trusses, anchors, hat channels, frame outs, diagonal bracing, girts, foam gap encosures, siding, roof sheeting, ridge cap, trim and accessories.
Curious about what you should expect during the installation of your new building? Although the installation process various among contractors, steel buildings are typically installed in a similar process. During installation you should expect to see everything from the concrete anchoring to the frame outs being cut on site to the installation of oyur accessories by an installation crew. The typical installtion process goes as follows: concrete sealant, base rails, legs, trusses, anchors, hat channels, frame outs, diagonal bracing, first, foam gap enclosures, siding, roof sheeting, ridge cap, trim, and accessories. For info on what building components are used on your steel building, check out our blog, Building Components For Buildings 32+.
Concrete Sealant
Concrete sealant is an opitional accessory that is not provided by every contractor. We recommend checking in iwth your salesperson to see if this is included in oyur building quotes! If your building does have cincrete sealnt, then you should expect to see this applied prior to the base rails being set. All MW steel buildings include complementary sealnt package for any 32′ + that includes a foam gasket sealant, a sponge-like materal with an adhesive backing and the concrete polyurethane sealant being applied on the edges of the foam for the additional protection against water seepage.
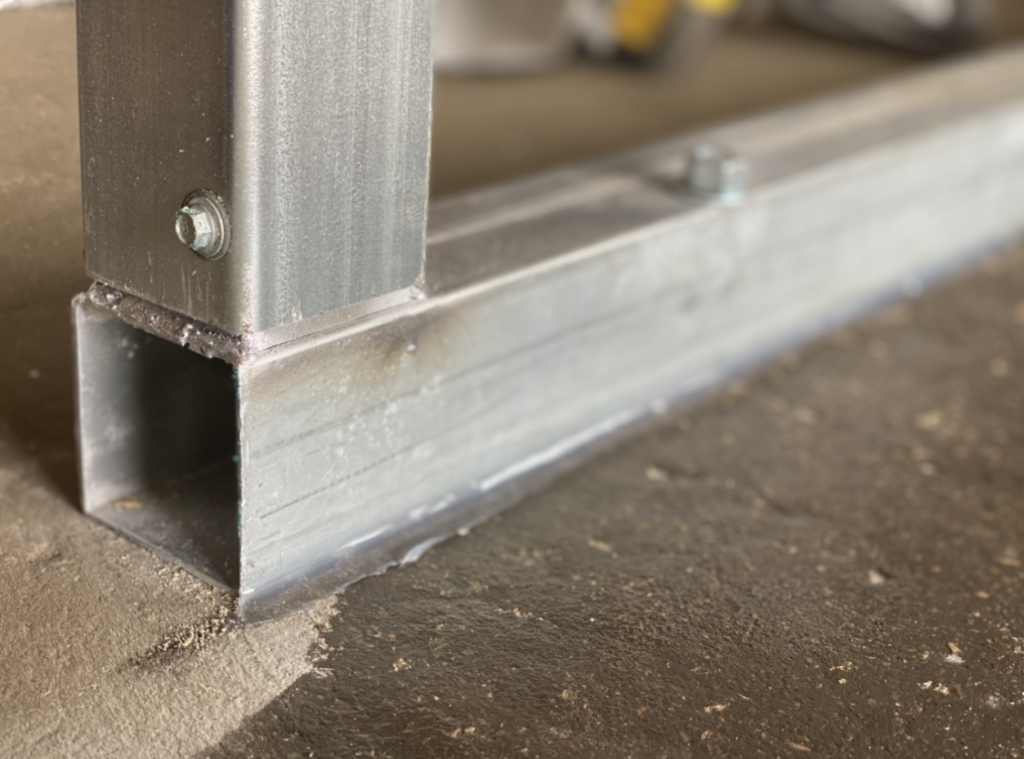
Setting base rails
After the sealant package has been applied, the base rails are set on top of the sponge-like material to spread the sealant completely beneath the base rail. The base rails of the building are essentially the base of the structure and what the weight of the building rests on. When settling the base rails, the installation crew will set the rails down and then measure them from corner to corner to assure that the building is square.
Legs
The legs/uprights/columns of your structure are just that- the “legs” of the building. You’ll find these on the sides of your structures to support the roof and the steel sheeting on the sides. Once your base rails have been set and squared, the legs will be raised and inserted into the nippo. A nippo is an insert that connects the legs of the metal building into the base rails.
Frame outs
Frame outs are openings on the building that are meant for accessories such as larger windows, doors on the side of the building, vents, and more. These frame outs are prefabricated and are then taken to the site ready to be installed. The frame outs are installed aftter the legs of the metal building to support the space where the rlgs are removed to sccommodate the accessory.
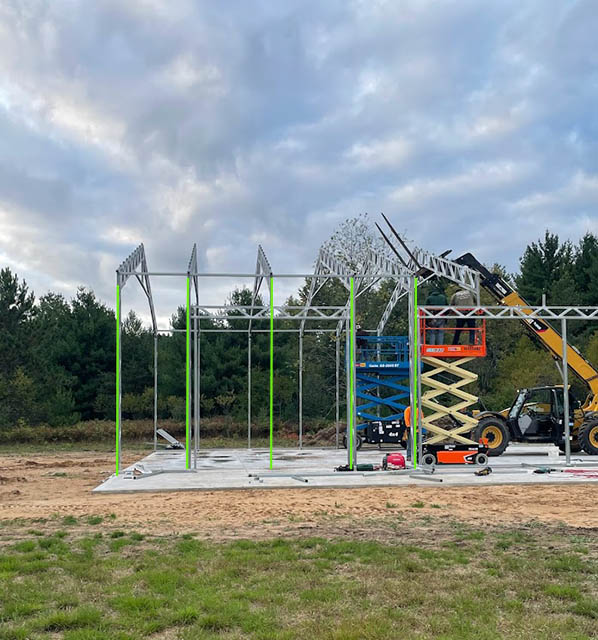
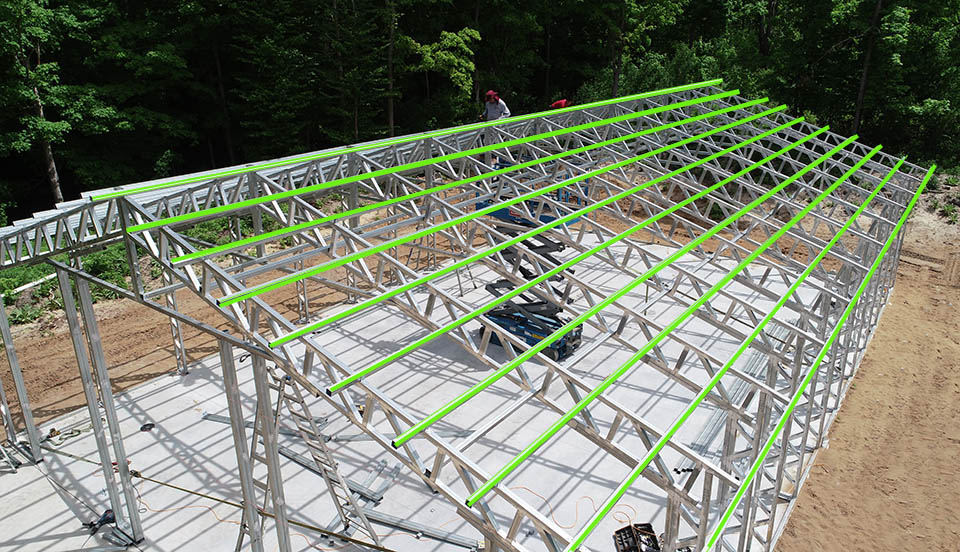
Trusses
Engineered webbed trussing is used on any structure that is over 30′ wide. The additional material used with webbed trussing provides extra structural support for the building’s roof trussing and legs. In order to connect the webbed trusses to the legs of the structure, the prefabricated trussing is lifted and is then slipped into the top of the legs. After being inserted into the legs, the trussing is then bolted with fabricated braces. Once the trusses are connected to the legs and bolted with braces, the trussing is secure, and the installation crew can move onto anchoring the structure.
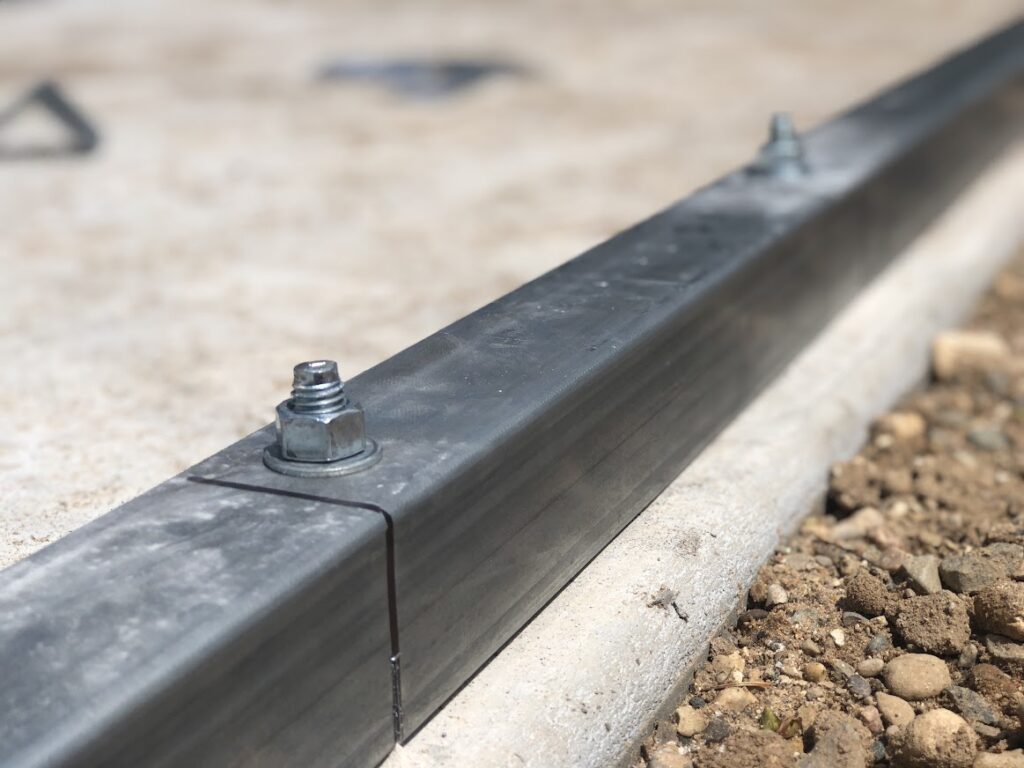
Anchors
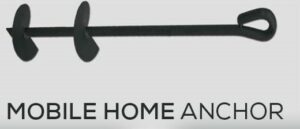
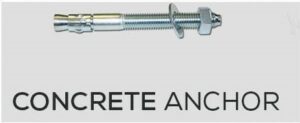
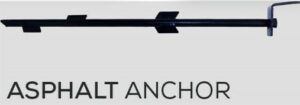
Anchors are how your steel building will be reinforced and anchored into the foundation for support. The types of anchors used in your building depend on the base your building will be installed on. If your building will be installed on concrete, it will require concrete anchors, if it will be installed on asphalt, it will require asphalt anchors, etc. Anchors are optional; however, they are highly recommended for every steel building considering this is how the building is secured to the base and wind certified. All anchors are installed differently, for example the concrete wedge anchor is drilled directly into the base rail, the mobile home auger is drilled into the ground using a machine beside the base rail and then bolted into the side, and the asphalt anchor is tapped into the ground beside the rail and then bolted into the side as well.
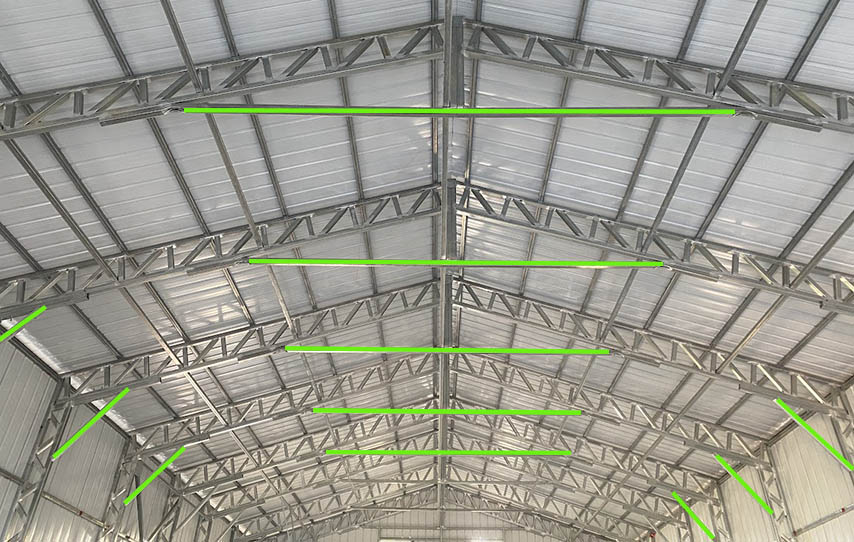
Hat channels
Hat channels/purlins can be found on the interior of your a-frame vertical roof running perpendicular to the trusses. You won’t find these on the standard or a-frame horizontal roof styles since they’re not needed with horizontal sheeting. The hat channels are used to support the vertical sheeting on the roof and are installed by being directly bolted onto the top of the trusses. Once the hat channels are installed the crew can move onto installing your frame outs.
Diagonal bracing
Diagonal bracing is structural bracing on the sidewalls of your steel building and are put in place to improve structural stability and prevents the sidewalls from collapsing and/or caving in. When isntalling diagonal bracing, the crews measure the area and cut the tubing at a 45 degree angle. From there, the tubing is bolted onto the framework.
Girts
Girts are extra square tubing that are used on the sides of the structure to support the vertical panels. These run horizontally on the interior of the sides of the steel structure. The girts are installed by being bolted directly into the legs of the structure.
Foam gap enclosures
Foam enclosures are foam strips that are designed to align with the ridges of the sheeting to seal any opening and stop light, depris, and small pests from entering the building. These can be found on any areas of the building where the light can enter, such as the ridge cap, the roof eves, and the corners of the building. The gap enclosures are applied directly to the steel sheeting so the sheeitng can be isntalled with the gap enclosures already in place. Foam enclosure packages are not required but are recommended to help seal off any openings to your building that may allow debris or small pests to enter. The foam gap enclosures are included in the MW package for buildings 26′ – 30′ wide and are complementary on any structure 32′ wide +.
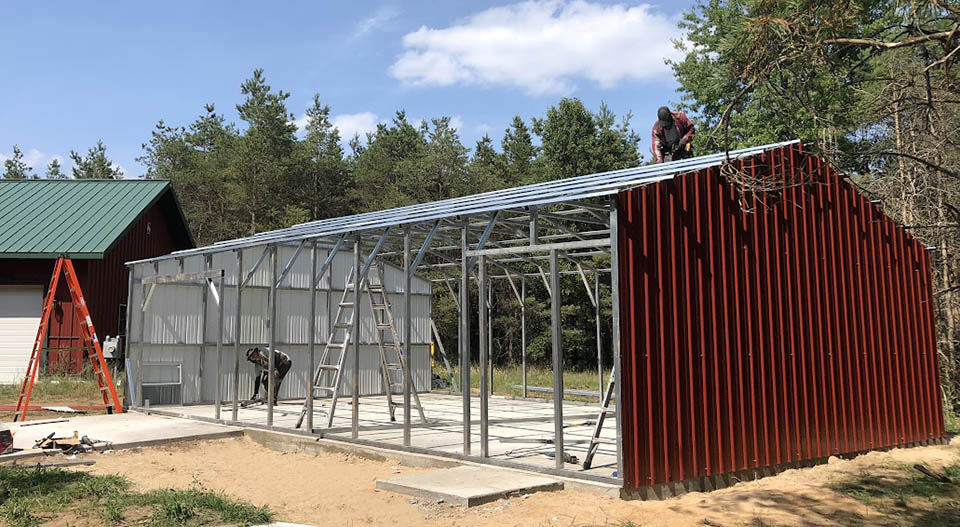
Siding
Once the foam gap enclosures have been applied to the steel sheeting, your sheeting is ready to be installed onto the sides of your steel building! When installing your steel sheeting, the panels are laid agaisnt the framework (the legs, girts, and diagonal bracing) and bolted directly into the material. Once your sheeting is bolted into the framework of your building it is secured and the installation crew can move onto the sheeting for the roof.
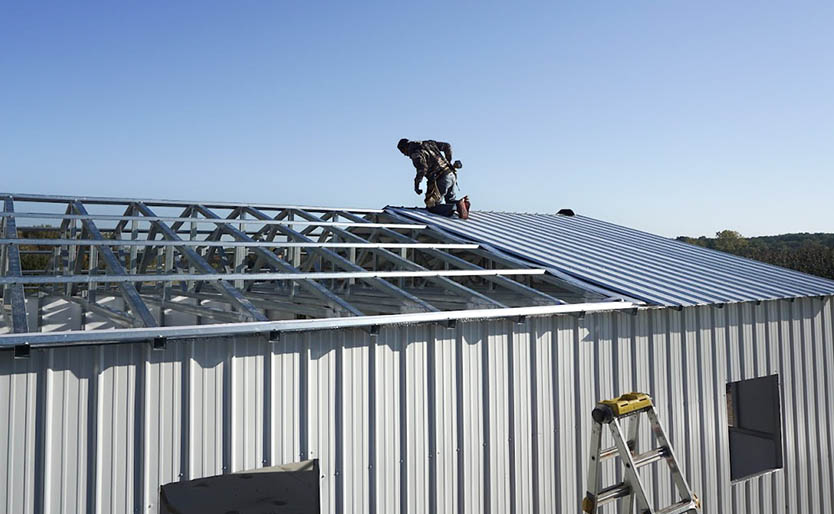
Roof sheeting
When installing the steel sheeting on the roof of your building, you’ll see the installation crew lay the steel sheeting down and begin bolting the panels directly onto the framework of the roof. New sheeting will be laid down once the previous panels have been bolted and secured to the roof’s framework. For the a-frame vertical roof, the sheet panels will be laid vertically, and the ridges will run from the peak of the building down the sides.
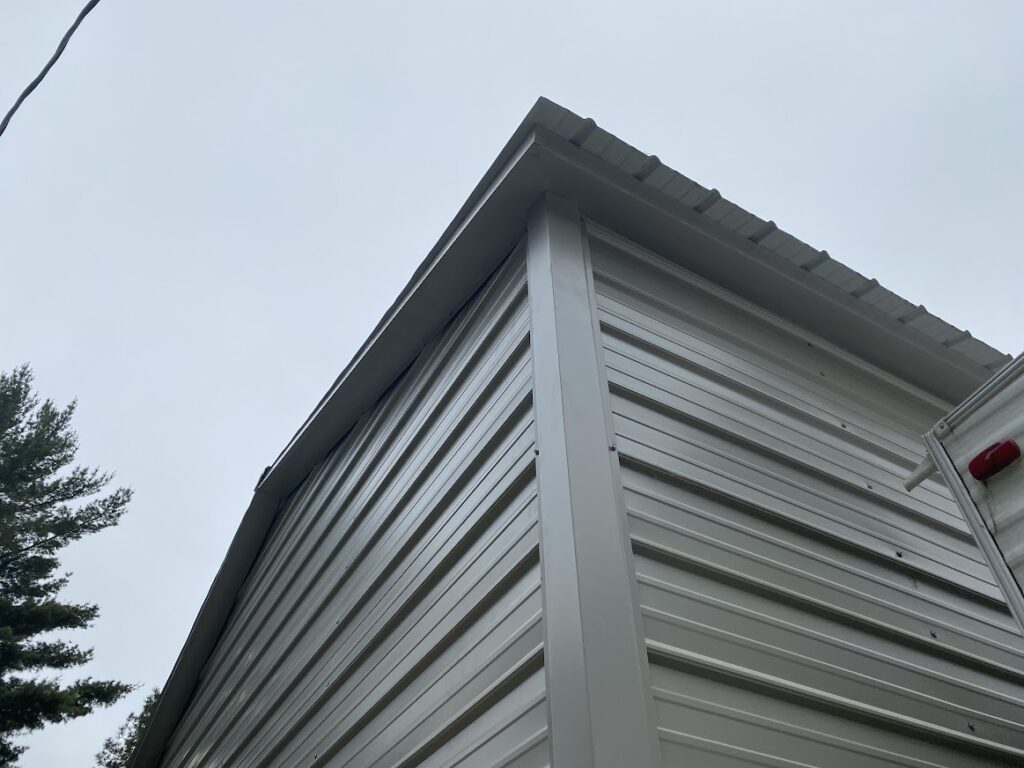
Ridge Cap
The ridge cap is installed on the roof of the building to the enclose where the steel sheeting meets and to eliminate any water, snow, debris, or small pests from entering the building through that opening. First the foam strip is applied in the opening and is then followed by the steel ridge cap, which is bolted into the steel panels on the roof.
Trim
Once the roof is finished, the next step in the process is to install the trim to cover any ridged edges on the sheet panels and to give your steel building a finished look. These are bolted into the edges of the steel sheeting. There are many different trim styles that are utilized on your building that all serve a different purpose. A few of these trim options include the base trim, corner trim, J-trim, and L-trim. The base trim is installed prior to the rest of your siding and is used to minimize water seepage and act as a barrier against any small pests. Corner trim is used on all the corners of your structure to enclose where the steel sheeting meets. J-trim is used on any windows and service doors and on any ridged edges on sheet panels. L-trim can be found on any roll-up door and overhead door openings.
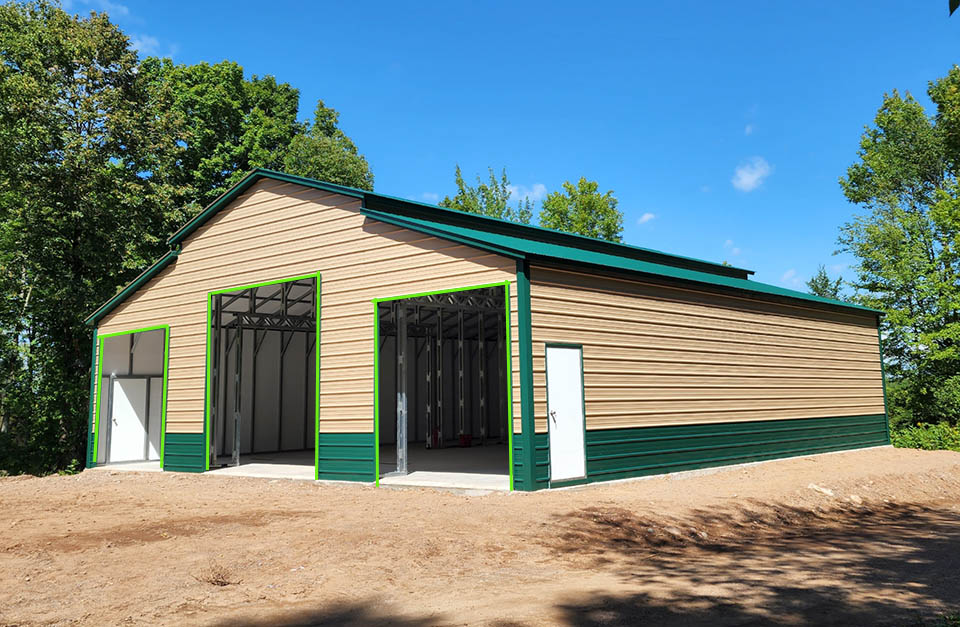
Accessories (doors, windows, etc.)
After the trim is installed, your installation crew is onto the last step of your building’s installation process! From here, you’ll see the crew adding in all of your accessories such as roll-up doors, walk-in doors, vents, windows, and any other accessories your building may have.
Get Yours in 1-4 Weeks
** Exclusions Apply **
Good
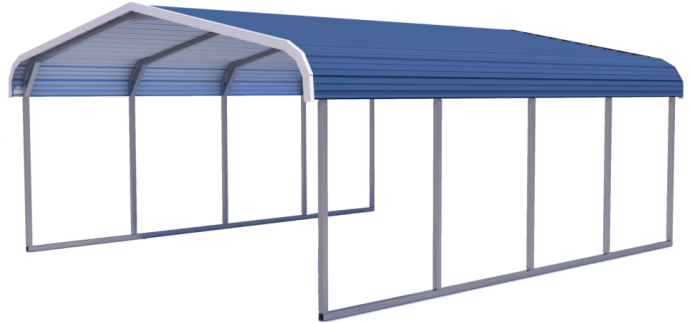
Standard Roof
Standard or known as “Regular” roof style have rounded corners. The regular roof has no trim on your eaves, ridge cap, nor purlins (hat channel) making it cost effective option. Standard roofs are best used in areas that experience fair weather year round.
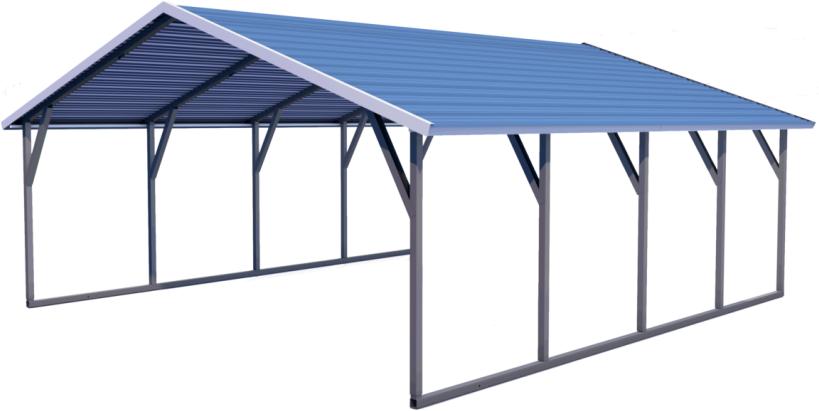
BETTER
A-Frame Horizontal Roof
A-Frame Horizontal roofs give your structure a residential look. The sheet panels run from side to side and does not have purlins or ridge cap. The increase in price to upgrade to A-Frame Horizontal is the additional welding needed on your trusses (bows). An excellent option to keep your residential look for residential areas for a minimum upgrade costs.
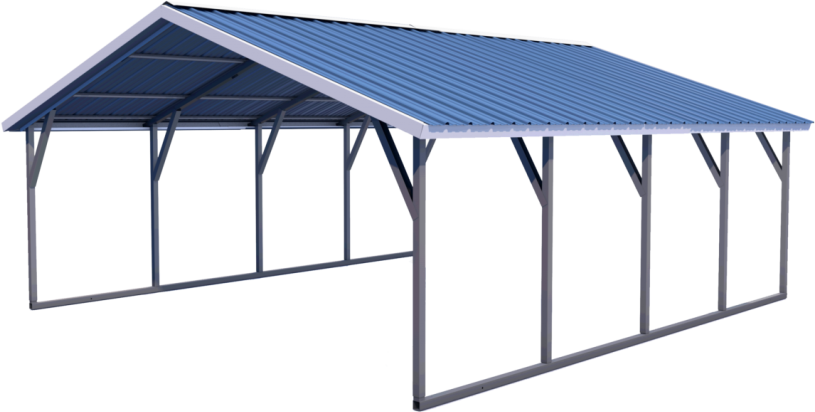
BEST
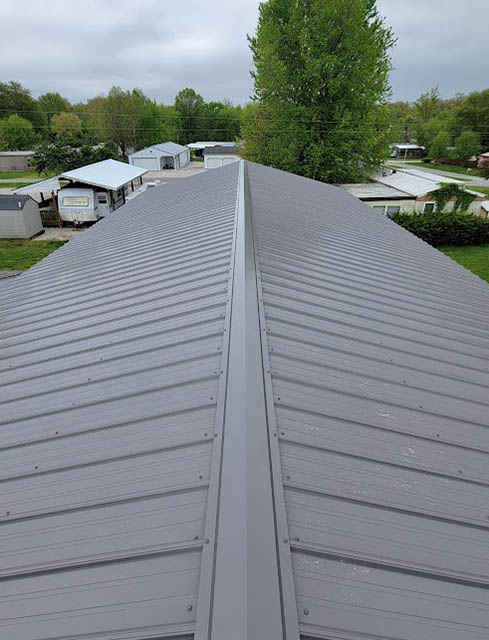
A-Frame Vertical Roof
Known as the best choice for areas that experience extreme weather conditions, the vertical roof style is hands down the best choice for Michigan weather. The roof panels run from the pitch to the eaves causing heavy snows, rain, and natural elements to slide off the roof easily. In order to tie down the panels to the structure, we must add purlins or hat channels lengthwise making the structure more rigid. The finished look with special trim all around the roof and ridge cap makes this roof style the best option.